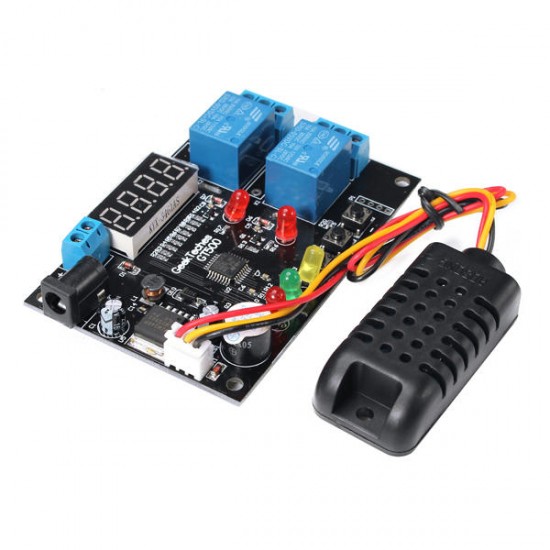
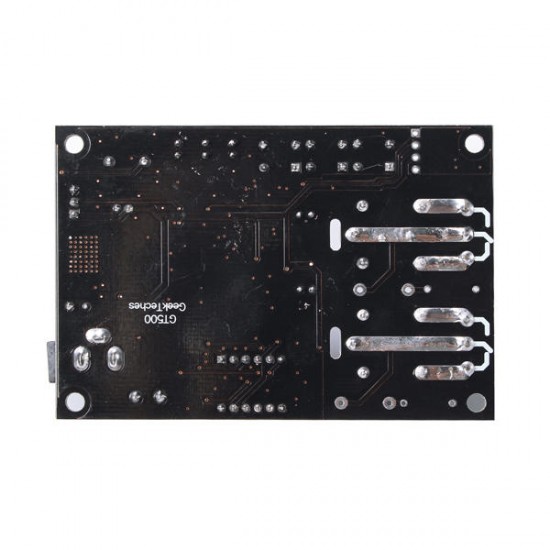
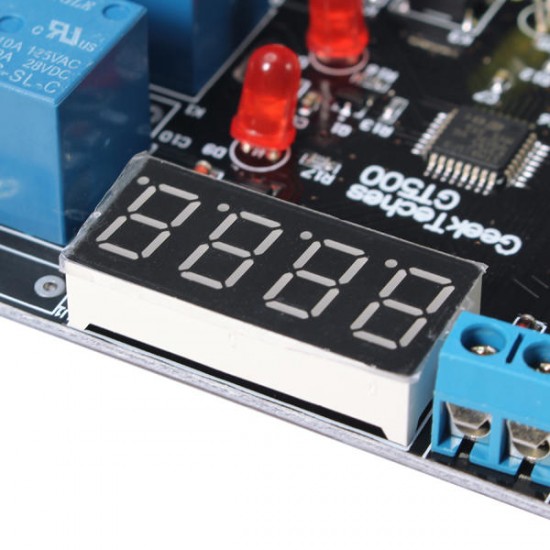
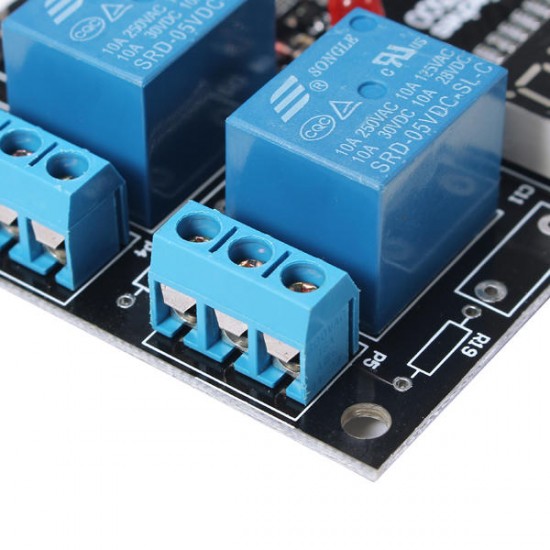
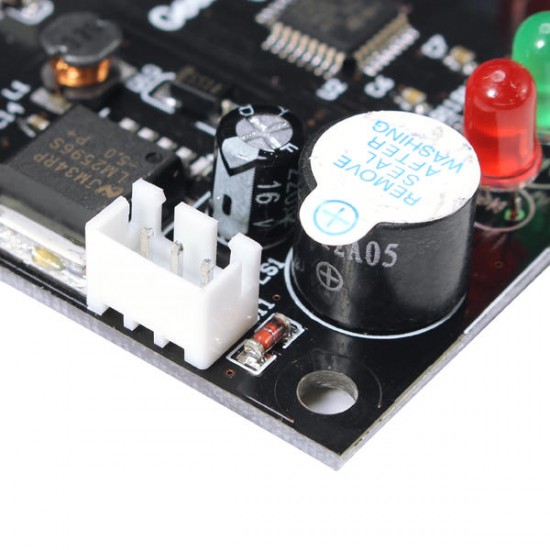
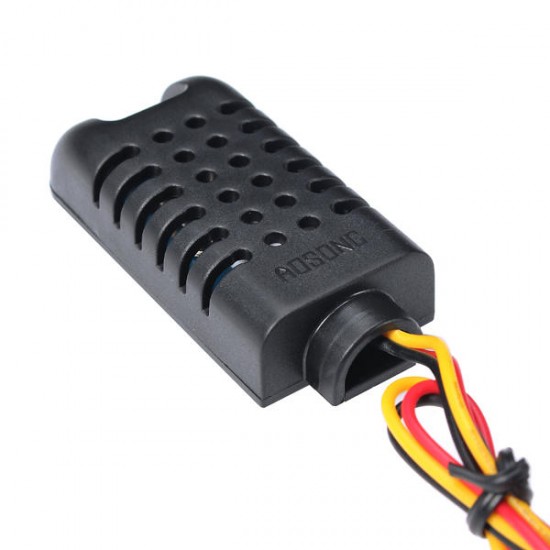
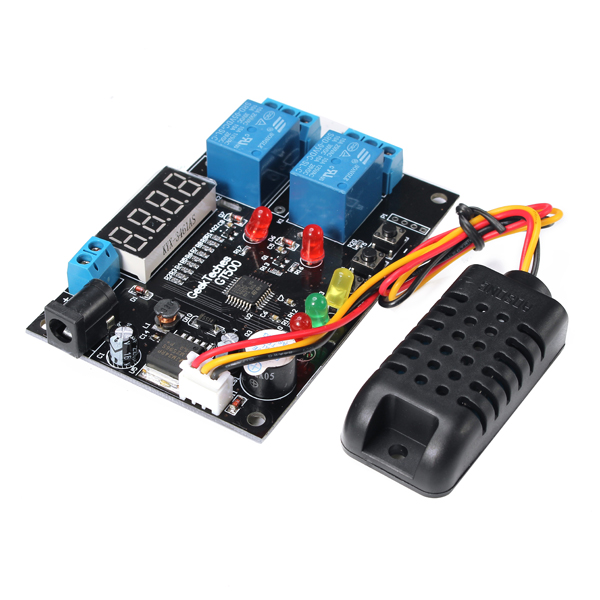
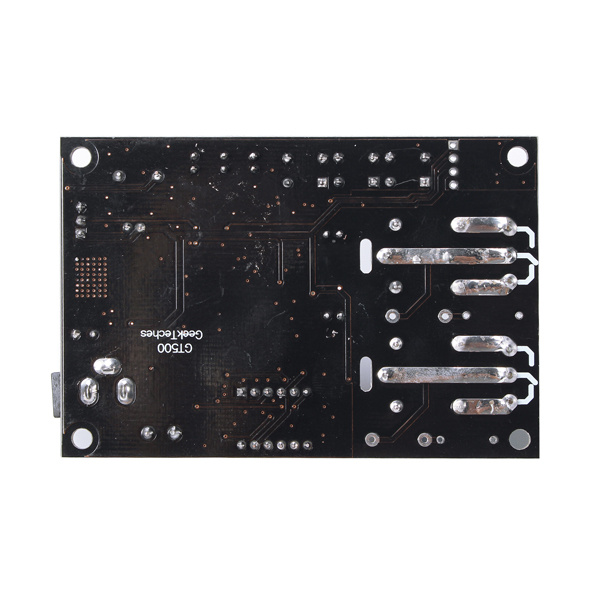
GT500 Temperature And Humidity Control Module With Sensor And Connection Cable


- Stock: In Stock
- Model: EB0043183
- SKU: EB0043183
Humidity measurement range: 0%RH
Temperature measurement range: -40℃ ~80℃
Resolving power: Humidity 0.1%RH, Temperature 0.1
Measurement accuracy: ±3%RH; ±0.5%℃
Control accuracy: 0.1%RH; ±0.1%℃
Refresh rate: 1S
Input voltage: 5V~24V DC
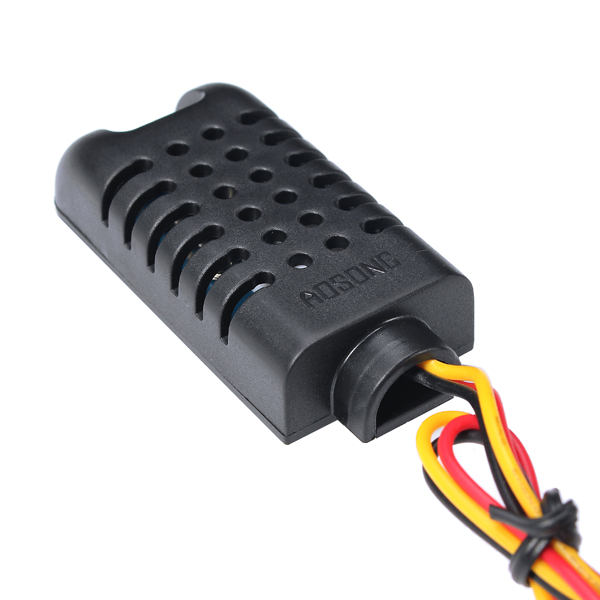
Measurement input: AM2301 temperature and humidity integrated sensor
Output: two way 10A relay
Environmental requirements: -10℃--60℃, humidity 20%--85%
Overall power consumption: Quiescent current≤20ma, Pull current≤50ma.
Function:
- With temperature and humidity control function.
- Can display the current temperature and humidity in real time.
- With over limit alarm function.
- Relay working indication function.
- With power supply reverse protection function.The controller does not work when the power supply is connected to the counter.
Indicator light:
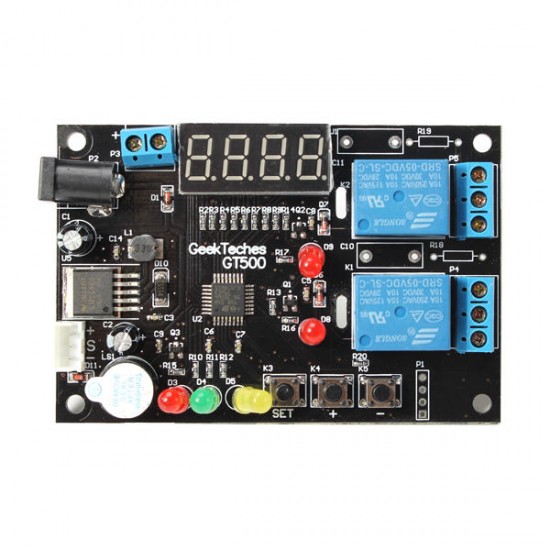
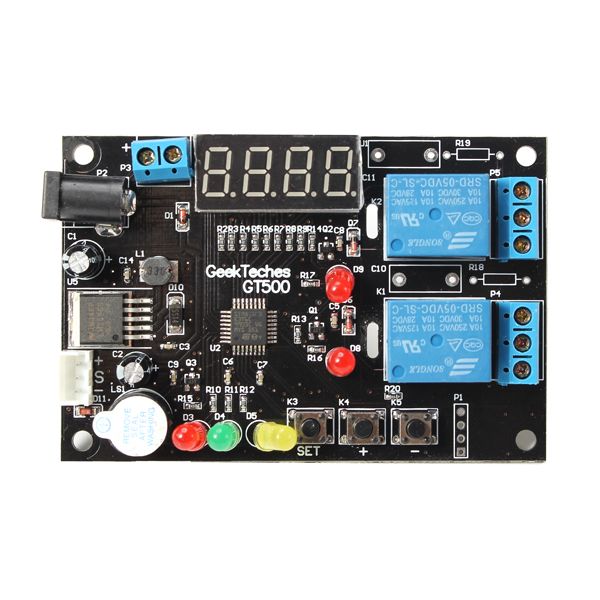
1. D8 is the temperature relay indicator lamp.Heating (cooling) equipment begins to work when the D8 light is turn on.
2. D9 is a humidity indicator relay indicator lamp. Humidification/ dehumidification equipment began to work when the D9 light is turn on.
3. The display is showing the real time humidity value when the green D5 light is turn on. The display is showing the real time temperature value when the D5 lamp goes out.
Function description:
1. High temperature start - cooling mode:
Refrigeration equipment begins to work when the starting temperature value is greater than the stop temperature value and the temperature measurement is greater than or equal to the beginning temperature. Refrigeration equipment will stop working when the temperature measurement is less than or equal to the stop temperature.
For example, Set the starting temperature to 20℃, Stop temperature is 15℃, D8 light is turn on and refrigeration equipment work when the detection temperature is greater than or equal to 20℃. D8 light went off and refrigeration equipment will stop working when the temperature value is less than 15℃.
2. Low temperature start - heating mode:
Heating equipment begins to work when the starting temperature value is less than the stop temperature value and the temperature is less than or equal to the beginning temperature. Heating equipment will stop working when the test temperature is greater than or equal to the stop temperature.
For example, Set the starting temperature to 15℃,Stop temperature is 20℃. D8 lights is turn on and Heating equipment begins to work when the temperature measurement value is less than or equal to 15℃. D8 light went off and Heating equipment to stop working when the temperature measurement value is greater than or equal to the stop temperature.
3. High humidity start - Desiccant mode:
The system automatically determines the mode of the dehumidification when the startting humidity value is higher than the value of the stop humidity.In this mode, dehumidification equipment to start work when humidity detection is greater than or equal to the beginning of humidity. Dehumidification equipment will stop working when the humidity detection is less than or equal to the stop humidity.
For example, Set the starting humidity to 60%RH, Stop humidity is 40%RH. Indicator light D9 lamp is turn on and dehumidification equipment start to work when the detected humidity value greater than or equal to 60%RH. Indicator light D9 went off and dehumidification equipment to stop working when Humidity detection value is less than or equal to 40%RH.
4. Low humidity start - humidification mode
The system automatically enters the humidification mode when the set start humidity is less than the value of the humidity value. In this mode, Humidification equipment began to work when the humidity detection is less than or equal to the beginning of humidity. Humidification equipment will stop working when the humidity detection is Greater than or equal to the beginning of humidity.
For example, Set the starting humidity to 40%RH, Stop humidity is 60%RH, Indicator light D9 is turn on and humidification equipment into the work when the humidity detection value is less than or equal to 40%RH. Indicator light D9 went off and humidification equipment to stop working the humidity detection value is greater than or equal to 60%RH.
5. Temperature alarm mode:
Display showing Axx (default is A00) and flashing in the boot 3 seconds, You can use "+" and "-" to set the alarm
Mode, Alarm modes are defined as follows:
A00: alarm function off (default)
A01: the currently detection of humidity beyond the starting temperature or stop temperature of 1℃, buzzer alarm.
A02: the currently detection of humidity beyond the starting temperature or stop temperature of 2℃, buzzer alarm.
A03: the currently detection of humidity beyond the starting temperature or stop temperature of 3℃, buzzer alarm.
and so on, max can be set A30.
For example ,Set alarm mode A03, Starting temperature is20℃,Stop temperature is 30℃, Buzzer sound alarm when the measured temperature is above 33℃ or below 17℃
Concrete setting method:
Notes: The following settings are automatically saved to EEPROM
1. Set start temperature:
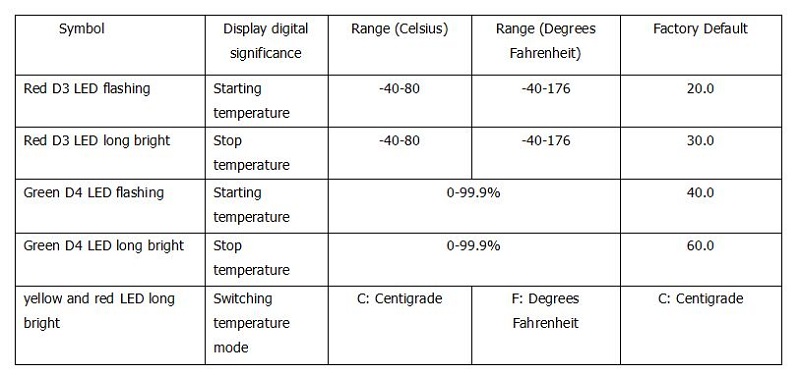
Long press S button for 3 seconds, Red light D3 start flashing. Display showing starting temperature value at this moment, Press + and - button to adjust this value, Long press is continuous adjustment. Long press S button to exit the adjustment after the adjustment is completed or automatic exit without key action in 10S.
2. Set stop temperature:
Long press S button for 3 seconds, Red light D3 start flashing. Short press SET button once again and red LED D3 long bright, Display showing stop temperature value at this moment, Press + and - button to adjust this value, Long press is continuous adjustment. Long press S button to exit the adjustment after the adjustment is completed or automatic exit without key action in 10S.
3. Set up the starting humidity:
Long press S button for 3 seconds, Red light D3 start flashing. Short press SET button twice again and red LED D4 start flashing. The display screen displays the starting humidity value, this value can be adjusted by pressing the + and - buttons, long press is continuous adjustment. Long press S button to exit the adjustment after the adjustment is completed or automatic exit without key action in 10S.
4. Set the stop humidity
Long press S button for 3 seconds, Red light D3 start flashing. Short press SET button three times again and red LED D4 start flashing. Display screen displays the value of the stop humidity at this time, this value can be adjusted by pressing the + and – buttons, long press is continuous adjustment. Long press S button to exit the adjustment after the adjustment is completed or automatic exit without key action in 10S.
5. Set the temperature model
Long press S button for 3 seconds, Red light D3 start flashing. Short press SET button four times again and red LED D3 and LED D4 start flashing at the same time. At this time the display screen display "C" or "F", this value can be adjusted by pressing the + and – buttons. C means that the current temperature model is degrees Celsius, F means that the current temperature pattern is Fahrenheit. Long press S button to exit the adjustment after the adjustment is completed or automatic exit without key action in 10S.
6. Set alarm mode
See also "function description" 5.temperature alarm mode.
7. Restore factory settings
Hold + and - press the button and then boot, Display screen display "rrrr", All settings are restored to factory settings after Buzzer sound three times.
Indicator status:
Package included:
1 x Temperature And Humidity Control Module
1 x Sensor
1 x Connection Cable
Shipping Time
After you successfully placed an order at RenhotecIC.com, you will receive a confirmation email with your invoice. Once your order is shipped, you will be emailed with the tracking information of your package. Also, you can choose your preferred shipping method during the checkout process. Kindly advise: please select DHL/FedEx if you need our product urgently.
The timeline of the whole shipping process is shown below:

The total delivery time is calculated from the time your order is successfully placed to the time received. Total delivery time is broken down into processing time and shipping time.
Processing time: The time it takes to prepare your item(s), includes preparing your items, performing quality inspections, and packaging for shipment. Normally, the processing time is 1-3 days (Only include Monday to Saturday ) after getting your order.
Shipping time: The time for your item(s) to travel from our warehouse to your destination. The shipping time depends on the shipping method you chose. Please refer to the shipping rate section for details.
Shipping Rates
You could choose the shipping method based on your preference during checkout, different shipping methods will apply different rates and shipping times. Please check the following chart for detail:
You could choose the shipping method based on your preference during checkout, different shipping methods will apply different rates and shipping times. Please check the following chart for detail:
| Shipping Method | Shipping Rates | Shipping Times |
| Flat Shipping (Promotion) | $10 | About 5-30 Working Days to Worldwide (Only include Monday to Saturday ) |
Standard Express(0.5KG starting price listed) | Based On Weights | About 5-15 Working Days to Worldwide (Only include Monday to Saturday ) |
Priority Express (0.5KG starting price listed) | Based On Weights | About 3-7 Working Days to Worldwide (Only include Monday to Saturday ) |
In addition, the transit time depends on where you're located, the shipping method you choose, and where your package comes from. We will keep you informed of any problems here to help you get your order as soon as possible.
If you want to know more information, please contact the customer service by contact form or sales@renhotecic.com. We will settle your problem as soon as possible. Enjoy shopping!


